Overview
Building a small-form-factor (SFF) PC isn't just about saving desk space—it's a philosophy of maximizing performance per liter. This guide walks you through the process of downsizing your rig, using two popular cases as examples: the ultra-compact DAN A4-SFX and the more flexible Streacom DA2. Whether you're a seasoned builder or a curious newcomer, you'll learn to fit high-end hardware into a fraction of the volume of a traditional tower.
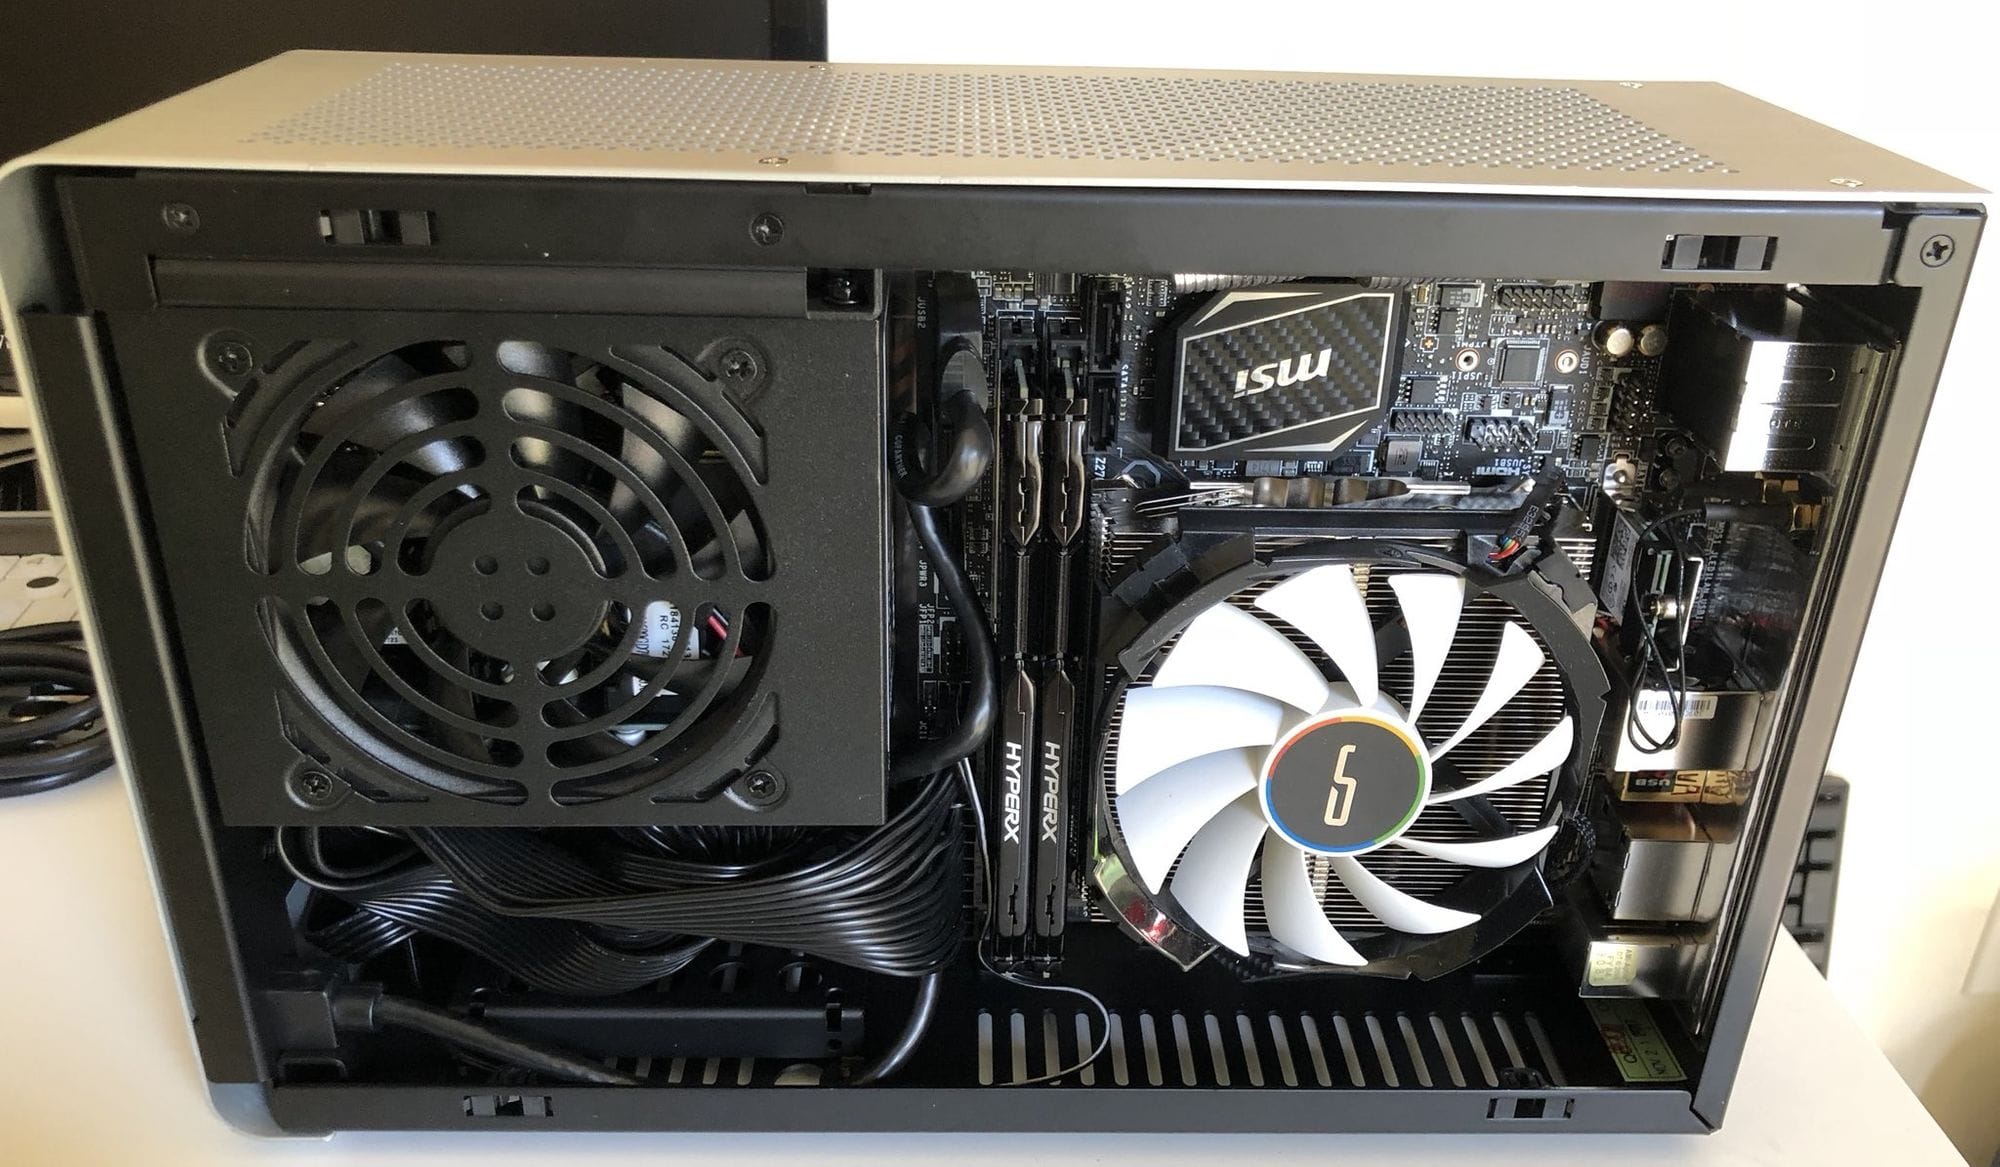
The modern PC market has shifted: while raw speed still matters, the real excitement lies in shrinking footprints. Smaller cases demand careful planning, but the payoff is a powerful, portable, and visually striking system. This tutorial mirrors a real-world upgrade from a mid-tower to a 17.5-liter DA2, packing an Intel i9-9900KS, RTX 2080 Ti, and 64GB of RAM.
Prerequisites
Tools and Supplies
- Phillips-head screwdriver (#0 or #1 recommended)
- Zip ties or velcro straps for cable management
- Anti-static wrist strap (or touch a grounded metal surface)
- Thermal paste (if reusing cooler)
- Flashlight or headlamp for tight spaces
Compatible Components
- Motherboard: Mini-ITX (must fit case's I/O shield and standoffs)
- Power Supply: SFX or SFX-L (check case support; some accept ATX via bracket)
- CPU Cooler: Maximum height: DAN A4-SFX ~48mm, Streacom DA2 ~145mm (example: Cryorig H7 @ 145mm fits DA2 exactly)
- GPU: Dual-slot, length limited: DAN A4-SFX ~295mm, DA2 ~305mm (with bracket removal)
- Storage: 2.5” SSDs or M.2 drives (mounting options vary)
Step-by-Step Instructions
1. Choose Your Case and Measure Everything
Case volume sets the difficulty level. The DAN A4-SFX is only 7.3 liters—a true challenge. The Streacom DA2 is 17.5 liters—more forgiving but still compact. Compare dimensions:
- DAN A4-SFX: 200mm × 115mm × 317mm = 7.3L
- Silverstone RVZ02/ML08: 380mm × 87mm × 370mm = 12.2L
- nCase M1: 240mm × 160mm × 328mm = 12.6L
- Streacom DA2: 180mm × 286mm × 340mm = 17.5L
For perspective, a PS4 Pro is 5.3L and Xbox One S 4.3L—these PC cases offer 50% more volume for over double the performance.
2. Verify Component Clearances
Measure every part against the case spec sheet. For the DA2:
- CPU cooler height: max 145mm (e.g., Cryorig H7 fits with no gap)
- GPU length: 305mm if you remove the front bracket; 280mm with it
- PSU: SFX (mandatory in DAN A4, optional in DA2 with bracket)
- Radiator support: none in DAN A4; 240mm in DA2 (but impacts GPU length)
Pro tip: Use cardboard cutouts to simulate clearance before buying.
3. Prepare the Case
For the DA2, remove the top and bottom acrylic panels with mesh dust nets. This improves airflow dramatically. The case uses a clever captured-nut-and-bolt system for brackets—familiarize yourself with the manual.
- Unscrew all panels (both sides, top, bottom).
- Pop out the acrylic panels by pressing from the inside.
- Set aside the mesh filters—they are reusable after cleaning.
- Lay the chassis flat on a work surface.
4. Install Power Supply
In an SFX case, the PSU often occupies an internal bracket. For the DA2, you can mount it in the front or side position. Use SFX-to-ATX adapter plate if using an ATX PSU, but SFX is recommended for airflow.
- Screw the PSU bracket onto the PSU.
- Orient fan outward (intake from outside).
- Attach bracket to case with included screws.
- Route main 24-pin and CPU power cables temporarily—don't zip tie yet.
5. Mount Motherboard and Cooler
- Install CPU, RAM, and M.2 SSD onto motherboard outside case.
- Attach CPU cooler (check height clearance again).
- Place I/O shield into case, then lower motherboard onto standoffs.
- Secure with screws in diagonal pattern.
- Connect front panel headers (power switch, LED, USB).
6. Install GPU
- Remove PCIe slot covers from case.
- Insert GPU into PCIe x16 slot. Secure with screws.
- For DA2: you may need to install a support bracket to prevent sag.
- Connect PCIe power cables from PSU (usually 8+6 pin for high-end cards).
7. Storage and Cabling
- Mount 2.5” drives on removable brackets (DA2 has multiple positions).
- Run SATA cables if needed, but M.2 drives are easiest.
- Tie cables neatly with zip ties, keeping them away from fans.
- Check that no cables obstruct GPU fans or CPU cooler.
8. Final Assembly and Testing
- Attach side panels, top, and bottom covers.
- Connect power, monitor, keyboard, and mouse.
- Power on: enter BIOS to verify RAM, CPU, storage are detected.
- Install OS and drivers. Run stress tests to check temps.
For the DA2, with hybrid open-air design, expect idle temps ~30-35°C and load ~70-80°C for a 9900KS with a 145mm tower cooler.
Common Mistakes
Overlooking Cooler Height
Measure twice, buy once. Many builders assume a 145mm cooler will fit, but some cases have 140mm max. The Cryorig H7 (145mm) fits the DA2 by less than 1mm—barely.
Ignoring GPU Width
GPU cards can be 2.5 slots thick. The DAN A4-SFX strictly supports dual-slot. Always check slot count, not just length.
Poor Cable Management in Tight Spaces
SFX PSUs have short cables. Use custom-length sleeved cables or modular PSU. In the DA2, fans on the bottom can catch loose cables.
Forgetting Fan Placement
In the DA2, you can add up to 4x 120mm fans. Don't skimp: two top exhaust and one bottom intake reduce GPU temps by 5-10°C.
Summary
Downsizing requires meticulous planning but yields a PC that's both powerful and portable. By choosing a case like the DAN A4-SFX (for minimalism) or Streacom DA2 (for flexibility), you can achieve top-tier performance in less than 18 liters. Follow the steps: measure clearances, install PSU first, mount motherboard and cooler, then GPU, and manage cables tightly. Avoid common pitfalls like cooler height and GPU width. With patience, you'll have a compact beast that rivals any full-tower—without the desk footprint.